· Guides · 4 min read
Custom event goals
Here are the steps you need to take to track custom events such as purchases, signups, button clicks or form submissions.
1. Change the vince snippet on your site
Please change the file name in the src attribute of your vince snippet from script.js to script.tagged-events.js. It should look like this:
<script defer data-domain="yourdomain.com" src="http://localhost:8080/js/script.tagged-events.js"></script>
If you’re using outbound link clicks, file downloads or any of our other script extensions, you can combine them by changing the
srcattribute in the snippet. If you want to track custom events and outbound link clicks simultaneously, change the script name toscript.tagged-events.outbound-links.js.
2. Add a CSS class name to the element you want to track on your site
Tag the site element you want to track with a CSS class name. How to do this varies depending on the site builder, CMS or framework you’ve used to build your site.
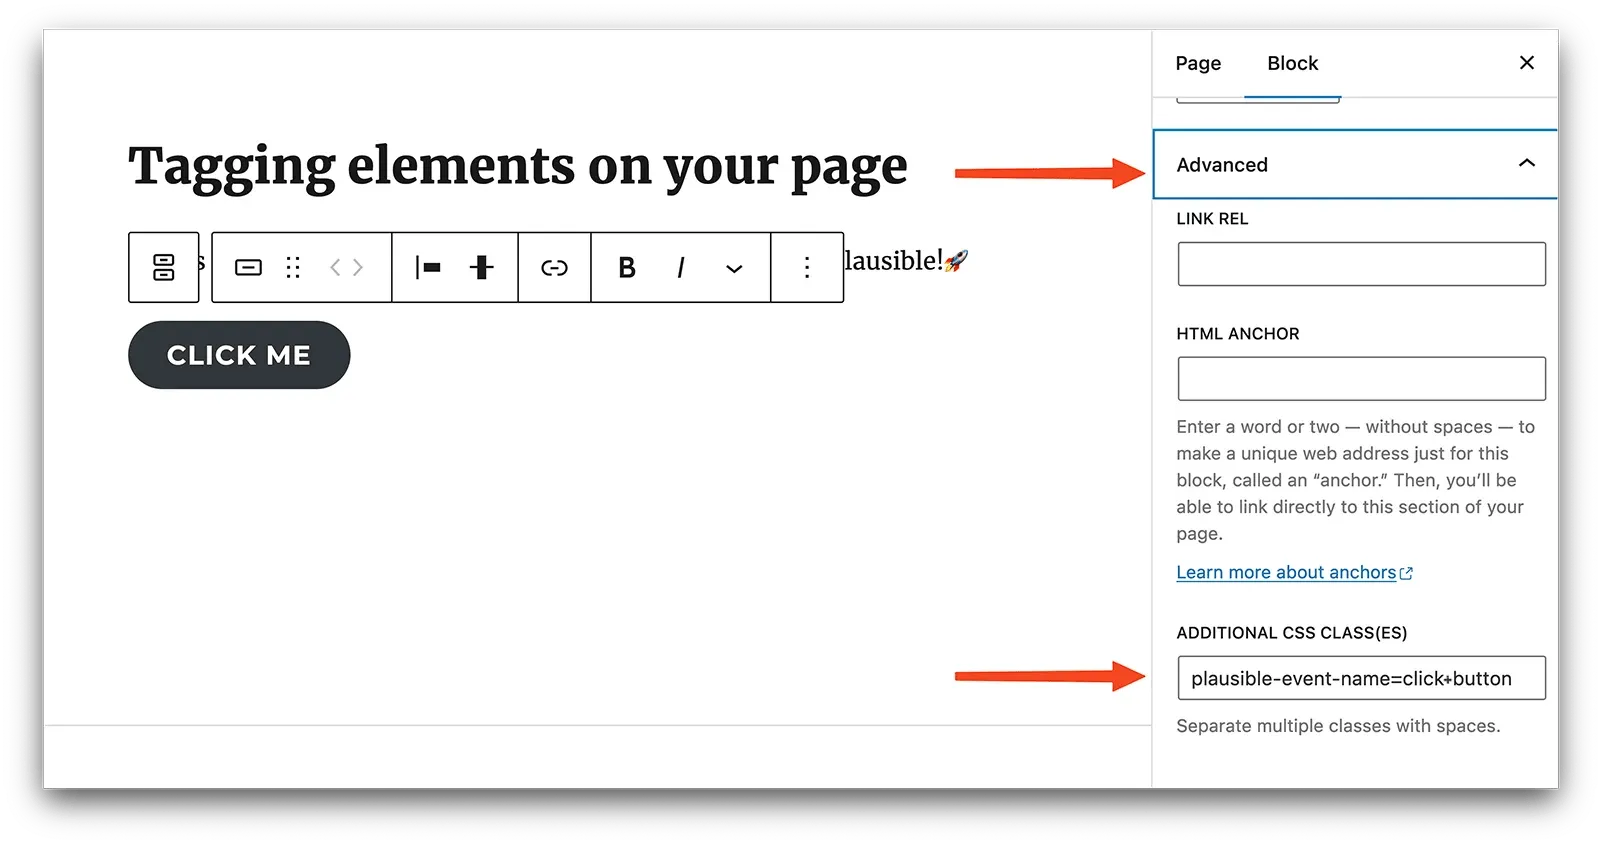
For instance, if you’re using WordPress, you can click on any block element you want to track such as a button or a form. This will open up the block menu on the right-hand side of your screen.

You can then click on “Advanced” and add a CSS class name in the “Additional CSS class(es)” field. Add the CSS class name in this format: vince-event-name=MyEventName. For instance, if you want to track form submissions on your contact form, you could use: vince-event-name=Form+Submit.

When tracking form submits, it is important to tag the <form> element itself with the vince-event-name=... class (not the input or button element inside the form). Normally, vince can track button clicks, but if a button is inside a form, it will navigate to the next page often leaving not enough time for the event to finish.
To represent a space character in the event names, you can use a
+sign. For example:vince-event-name=Form+Submitwill display asForm Submitin your dashboard
Some CMSs (like Webflow) do not support an equals sign (
=) in the classnames. If that’s the case, use a double dash (--) instead of the equals sign. For example:vince-event-name--signup.
You can also add class names directly in HTML
If you can edit the raw HTML code of the element you want to track, you can also add the classes directly in HTML. For example:
<!-- before -->
<button>Click Me</button>

<!-- after -->
<button class="vince-event-name=Button+Click">Click Me</button>
Or if your element already has a class attribute, just separate the new ones with a space:
<!-- before -->
<button class="some-existing-class">Click Me</button>

<!-- after -->
<button class="some-existing-class vince-event-name=Button+Click">Click Me</button>
Verify that the CSS classes were added correctly
After adding the class, please go back to your site, and verify that the class attribute got added with the exact required format. You can check it by right-clicking the element and inspecting it. This will show you the HTML code of the element.
In some cases, the tracking classes might be added to a wrapper <div> element (parent to the element you want to track), but don’t worry, vince will still be able to track clicks on the child element if its parent has the necessary classes.
Some CMSs like Webflow do not support an equals sign (=) in the classnames. If you add a class attribute with the value vince-event-name=Signup, but when you go back to your page and inspect the element, it might have class="vince-event-name-Signup" (equals sign replaced with a hyphen). If that’s the case, use a double dash (--) instead of the equals sign. For example: vince-event-name--signup.
Tracking form submissions may currently not work with forms that contain an element with
id="submit"orname="submit". To work around this limitation please rename theidornameattribute value to something else. If you’re unable to do that, please look into implementing custom events manually with JavaScript
If your CMS does not support adding CSS classes, please expand the following section of instructions.